
Best Kilts & Jackets For Men And Women
How To Press Your Kilt
Oct
The kilt pressing is fun and excited. As you know the difference between Scottish kilts and skirts is the pleats. Scottish kilts have more back pleats than women skirts. The more the pleats, the more attractive the Scottish kilt. The beauty of the Scottish kilts lies on the back pleats. If there are no back pleats then that garment is never said to be a kilt.
Well, pressing the Scottish kilts is not as difficult as it looks. The main difficult parts of pressing the kilts at the backside. It has wrinkles and pleats which make it difficult in pressing. This backside requires special practice because a newbie can burn the backside of the Scottish kilts. However, the front apron and the sides of the kilts are easy to press. The pressing of these areas is similar to pressing different garments i.e, pants, coats, trousers, and skirts.
As you know, there are too many varieties of Scottish kilts, the above example is for the wool kilts. The pressing of wool kilts is easier than that of utility, leather, and other style kilts. The wool kilts are the traditional kilts that have only straps and buckles. So, in this article, we will try to discuss the pressing of all types of kilts but first, you must understand the pressing of a traditional tartan or wool kilt.
How To Press Your Kilt
This is an easy step-by-step guide on pressing a traditional wool kilt. If you have a kilt right now then you can do it practically otherwise you must have a pen and a notebook in order to write important points for pressing a traditional kilt. Before knowing how to press a traditional kilt, you must understand some essentials.
- You must put the kilt on and stand in front of the mirror. The mirror helps you in re-creasing the pleat if there is a need.
- When you stand in front of the mirror, you should look at the hang of the pleats. If there is a wavy look and have a stage curtain then the pleats will need to be re-creased completely.
- The pleat edges of the traditional tartan kilt should be sharp as it creates beauty in the kilt but if the pleat edges of your kilt are smooth, not sharp then there is a need for a re-press.
- When the pleat edges will become sharp and the kilt pleats are hanging well, the next step is to be steamed from the Iron.
- Automatic Iron is good for steaming the kilt pleats but if you don’t have then you can use casual Iron.
Precautions Of Using Iron
Using Iron on kilts can be dangerous if you do not know how to use it properly on kilts. Ironing on different garments such as pants, coats, shirts, and skirts is easy but the ironing of Scottish kilts needs more care. You must adjust the heat level on the pleats, so that it does not burn. Here are some precautions that you must understand when you use Iron on the kilts.
- Well, the Scottish tartan kilts are not pants or shorts, so there is no need to apply more heat.
- If you apply more heat on kilts than the kilt may burn or crease right out.
- Shoot the jet of a steam 4-5 inches away from the kilt pleat. At a time, you can pull 4-5 pleats of the wool kilt.
- You should also touch the fabric from time to time so that it does not get too hot.
- One important thing, if the fabric becomes hot then waits for a couple of seconds to make it cool then shoot the steam again. Repeat this process in 4-5 pleats at a time.
Re-Set The Pleats
In re-setting the pleats, the following points must be understandable
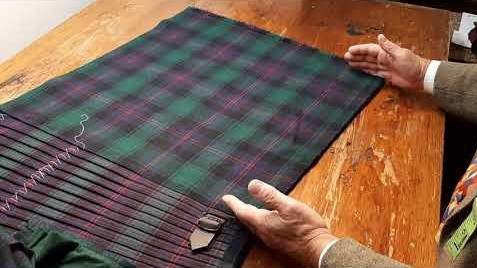
- You must lay down the kilt on a flat surface such as an Iron table or a floor. I think the floor is perfect for it.
- Adjust the iron according to the fabric i.e, wool, cotton, denim, and leather. For contemporary kilts, there needs more heat than wool kilts
- You must have a cloth which you can feel moisture because it is important. You can take any cloth.
- Now you need a needle and a thread. An Upholstery Thread is good but if you don’t have this then you can use any heavy-duty thread.
- The pleats are now basted. Baste the pleats is very helpful as it holds the pleats firmly and the pressing will be easy.
- Keep it in your mind that you are not sewing the pleats, you are only holding the pleats while you press.
- Do not use pins because pins may leave large wrinkles in your pleats.
- After basting the entire kilt, you must use a pillow or bath towel to lift the pleats up till the pleats.
- The pressing cloth is now laid down to the pleat area. The Iron is placed on the covered area and then throws a jet of steam in that area.
- Remove the pressing cloth and allow the kilt to cool.
- The pleats of the kilt are now hanging perfectly and straight but if there is still a wavy look then repeat the process again.
- Now it will completely re-set the pleating of your Scottish traditional kilt.
- Put your kilt on and stand in front of the mirror. If everything is fine then go outside and show your pressing work to other family members or friends.
Conclusion
This is the simple guide for How To Press Your Kilt. We make this helping guide not only for the professionals but also for the newbies. By following this guide, you can easily understand how to press the traditional style Scottish kilts. If you are planning to try to Iron the modern design kilts then you must take care of the metal hardware such as buttons, studs, clips, and buckles. Some kilts have leather patches and straps, so adjustable heat is required. You can use mini Iron for Ironing the kilts which have more hardware. The procedure of pressing every Scottish kilt is the same but first, you go with the tartan kilt.